b. Create an HPC Cluster with EFA
In this step, you create an HPC cluster configuration that includes parameters for Elastic Fabric Adapter (EFA).
If you are not familiar with AWS ParallelCluster, we recommend that you first complete the AWS ParallelCluster lab before proceeding.
In particular, you need to follow the instructions to install AWS ParallelCluster: pip-3.6 install aws-parallelcluster -U --user && pip-3.6 install awscli -U --user
Create a Cluster Configuration File for EFA
This section assumes that you are familiar with AWS ParallelCluster and the process of bootstrapping a cluster.
Generate a new key-pair and new default AWS ParallelCluster configuration.
# generate a new keypair, remove those lines if you want to use the previous one
aws ec2 create-key-pair --key-name lab-EFA-your-key --query KeyMaterial --output text > ~/.ssh/lab-EFA-your-key
chmod 600 ~/.ssh/lab-EFA-your-key
The cluster configuration that you generate for EFA includes the following:
- Set the compute nodes in a Cluster Placement Group to maximize the bandwidth and reduce the latency between instances.
- Set the compute nodes as c5n.18xlarge instances. You can change the instance type if you like, but you need to make sure you use one of the EFA supported instance types .
- Set the cluster initial size to 0 compute nodes and maximum size to 8 instances. The cluster uses Auto Scaling Groups that will grow and shrink between the min and max limits based on the cluster utilization and job queue backlog.
- The selected job scheduler for this example is SLURM
For more details about the configuration options, see the AWS ParallelCluster User Guide and the EFA parameters section of the AWS ParallelCluster User Guide.
# create the cluster configuration
IFACE=$(curl --silent http://169.254.169.254/latest/meta-data/network/interfaces/macs/)
SUBNET_ID=$(curl --silent http://169.254.169.254/latest/meta-data/network/interfaces/macs/${IFACE}/subnet-id)
VPC_ID=$(curl --silent http://169.254.169.254/latest/meta-data/network/interfaces/macs/${IFACE}/vpc-id)
AZ=$(curl http://169.254.169.254/latest/meta-data/placement/availability-zone)
REGION=${AZ::-1}


mkdir -p ~/.parallelcluster
cat > my-efa-cluster.ini << EOF
[aws]
aws_region_name = ${REGION}

[global]
cluster_template = default
update_check = false
sanity_check = true

[cluster default]
key_name = lab-EFA-your-key
vpc_settings = public
ebs_settings = myebs
compute_instance_type = c5n.18xlarge
master_instance_type = c5.2xlarge
cluster_type = ondemand
placement_group = DYNAMIC
placement = compute
max_queue_size = 4
initial_queue_size = 0
disable_hyperthreading = true
scheduler = slurm
enable_efa = compute
base_os = alinux2

[vpc public]
vpc_id = ${VPC_ID}
master_subnet_id = ${SUBNET_ID}

[ebs myebs]
shared_dir = /shared
volume_type = gp2
volume_size = 20

[aliases]
ssh = ssh {CFN_USER}@{MASTER_IP} {ARGS}
EOF
If you want to check the content of your configuration file, use the following command:
cat my-efa-cluster.ini
Now, you are ready to create your HPC cluster.
Generate a Cluster for with EFA enabled
Create the cluster using the following command. This process would take about 5 minutes.
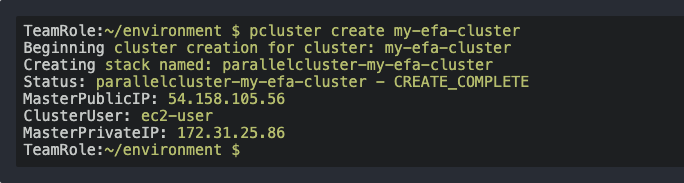
pcluster create my-efa-cluster -c my-efa-cluster.ini
and the output would be something like this
Connect to Your Cluster
Once created, connect to your cluster.
pcluster ssh my-efa-cluster -i ~/.ssh/lab-EFA-your-key
Next, take a deeper look at the EFA device.