c. Connect to your NICE DCV Session
The pcluster dcv connect command interacts with the NICE DCV server running on the master instance. When you run this command to connect to your DCV cluster, you will get a browser URL which expires 30 seconds after it is issued. If the connection is not made before the URL expires, run pcluster dcv connect again to generate a new URL
To connect to your NICE DCV session, simply run the following command in your AWS Cloud9 Terminal:
pcluster dcv connect [cluster] -k [keyname]
where [cluster] specifies the name of your cluster and [keyname] specifies the location of your private key.
pcluster dcv connect my-dcv-cluster -k ~/.ssh/lab-dcv-key
You will get a browser URL to connect to the NICE DCV session running on the master instance, copy and paste the URL in your browser
See example video below
Note: If you are using Firefox, you might have a warning because of the self-signed certificate. If this is the case, you can simply bypass this by clicking on Advanced and then Accept the Risk and Continue.
Now that you can successfully connect to your NICE DCV session and open a terminal, you can next run a test application and visualize output.
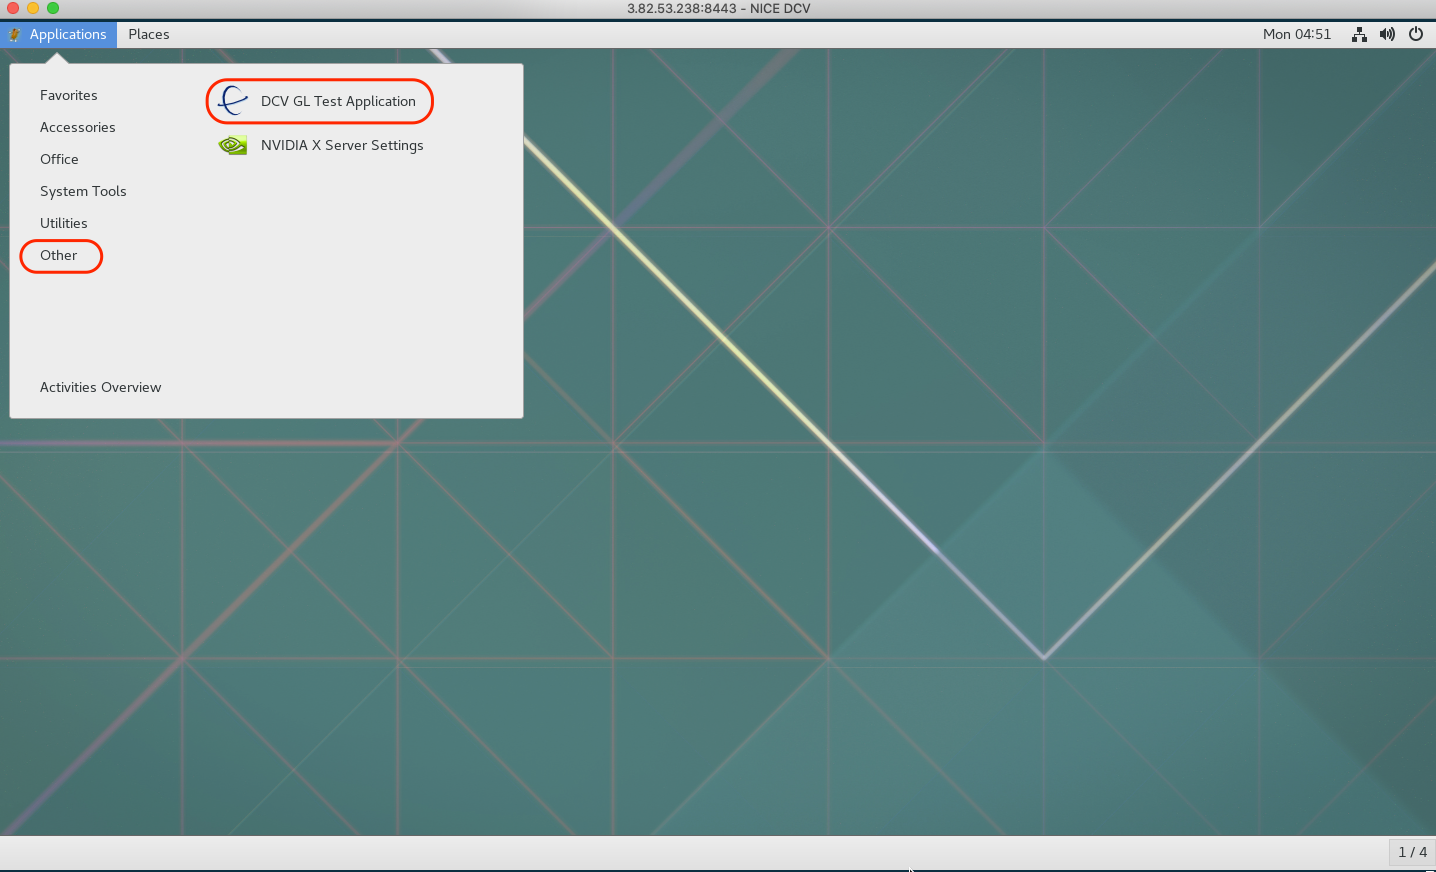
In the current version of ParallelCluster, the DCV Test GL application that we want to run might not be available. Check if it is available by going to Applications → Other → DCV GL Test Application
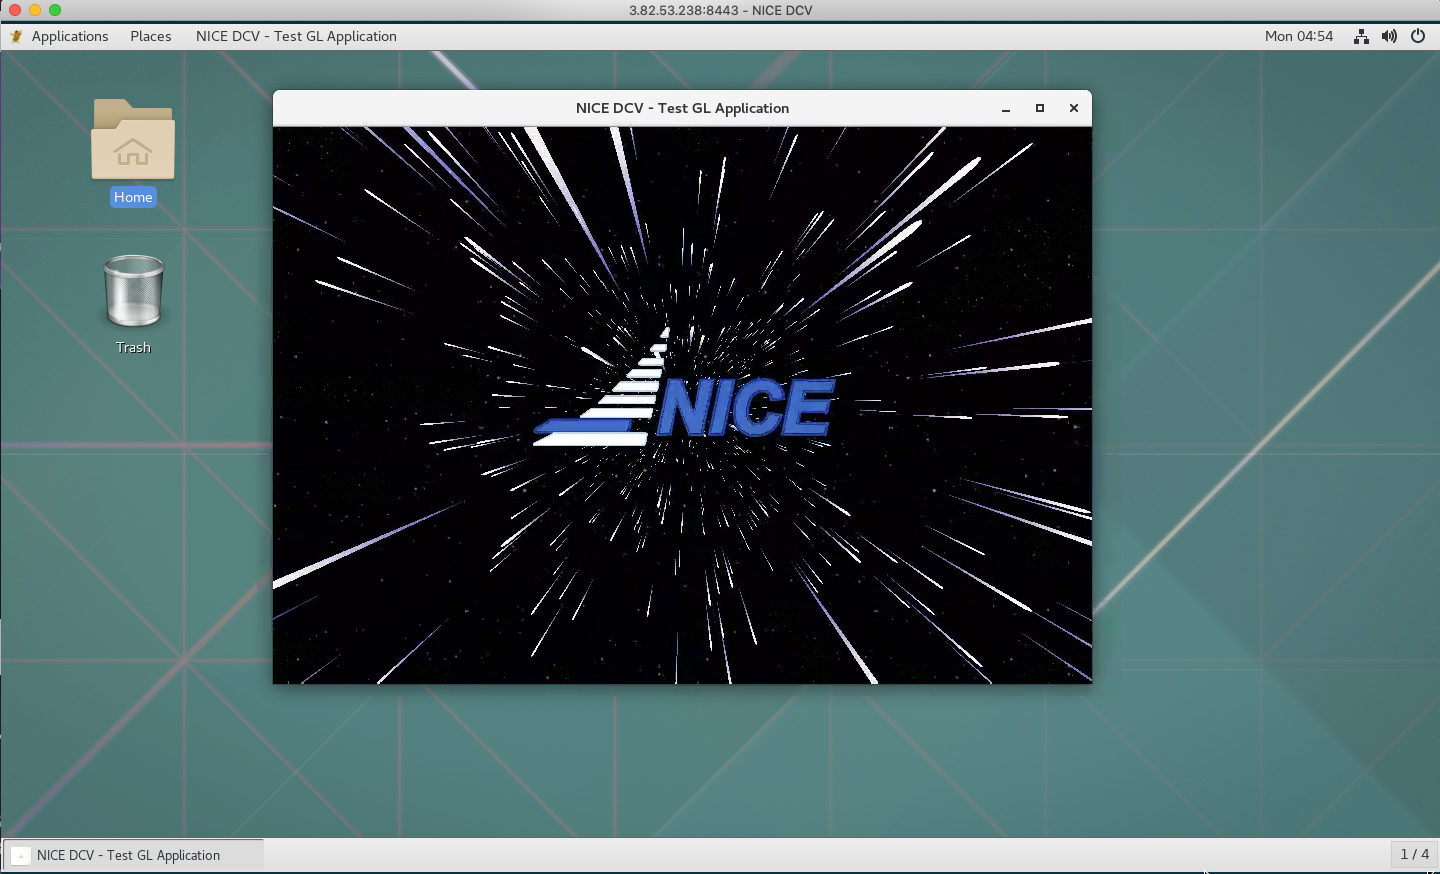
If you have the application, run it. You should see this:
If the application is not available, go back to your Cloud9 environment and paste the following command in your terminal to connect to the master of your cluster:
pcluster ssh my-dcv-cluster -i ~/.ssh/lab-dcv-key
You can now paste the following commands:
cat > ./install_dcv_gltest.sh << EOF
#!/bin/bash
set -e # exit on error

# install dcvgltest
sudo rpm --import https://d1uj6qtbmh3dt5.cloudfront.net/NICE-GPG-KEY
wget https://d1uj6qtbmh3dt5.cloudfront.net/2020.0/Servers/nice-dcv-2020.0-8428-el7.tgz
tar -xvzf nice-dcv-2020.0-8428-el7.tgz
cd nice-dcv-2020.0-8428-el7
sudo yum install nice-dcv-gltest-2020.0.229-1.el7.x86_64.rpm
EOF
This is a simple script to install the DCV Test GL application. If something does not work, please refer to the DCV installation tutorial (steps 1 through 5 and then install the nice-dcv-gltest package). Paste this into your terminal to launch the installation script:
chmod +x ./install_dcv_gltest.sh
./install_dcv_gltest.sh
You are now able to launch the DCV Test GL application as explained earlier.
NICE DCV Licensing: The NICE DCV server does not require a license server when running on Amazon EC2 instances. However, the NICE DCV server must periodically connect to an Amazon S3 bucket to determine whether a valid license is available. AWS ParallelCluster automatically adds the required permissions to the ParallelClusterInstancePolicy, so the user does not need to do anything.