b. Connect to NICE DCV EC2 Instance
In this section, you connect to your NICE DCV EC2 instance, setup password required for DCV Remote Desktop Session and launch a DCV Session. You will do all this on AWS Cloud9 terminal.
Connect to your instance
If you are having issues connecting to your instance, navigate to the EC2 Dashboard in the AWS Management Console. Select your instance and review its details. See also the troubleshooting section at the bottom of this page.
After the instance is running, follow these steps:
-
Navigate to the AWS Cloud9 environment and open a terminal window.
-
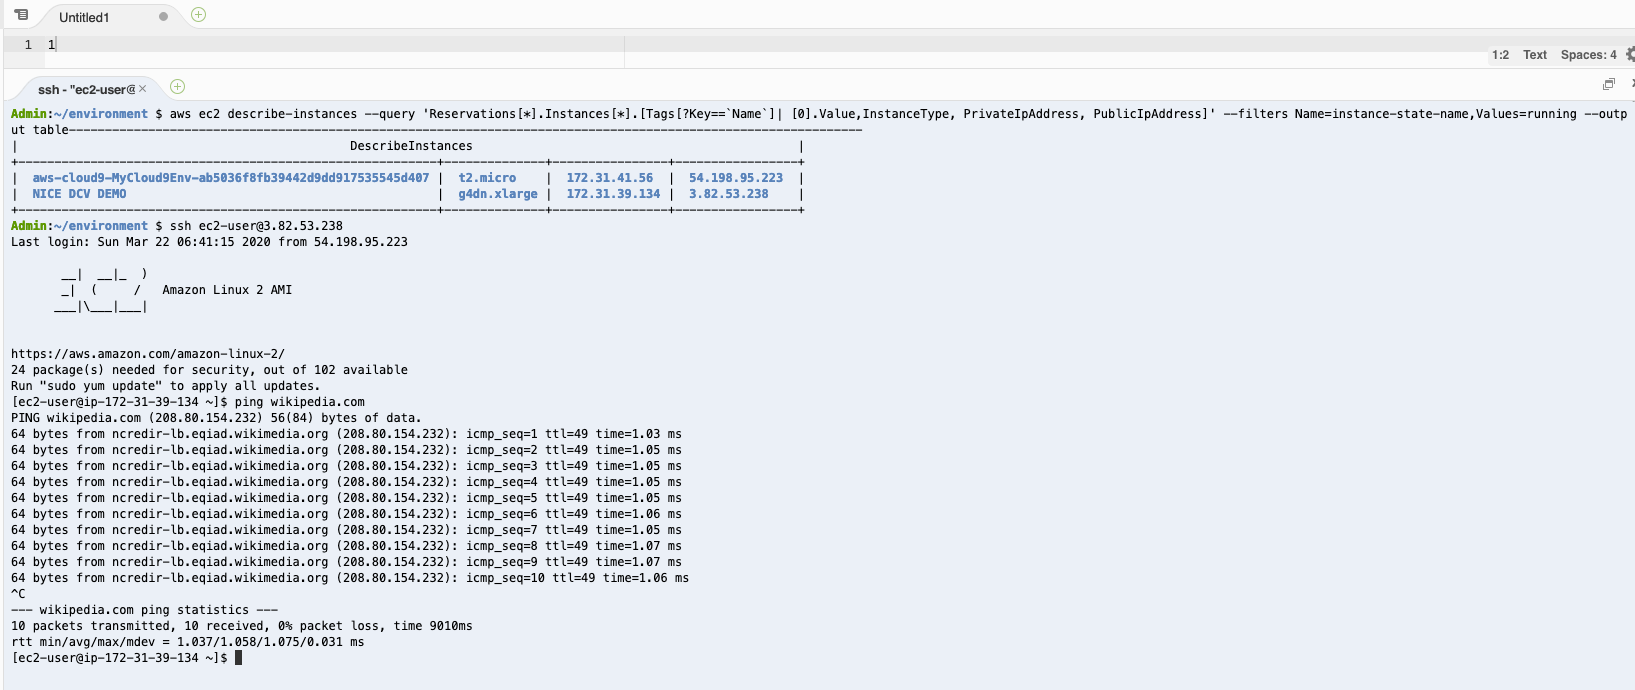
Use the following command to list running instances and display their names, type, private IP address, and public IP address. Here, the information is filtered to only keep certain details (hence the complex command). The same information is displayed on the EC2 Dashboard.
aws ec2 describe-instances --query 'Reservations[*].Instances[*].[Tags[?Key==`Name`]| [0].Value,InstanceType, PrivateIpAddress, PublicIpAddress]' --filters Name=instance-state-name,Values=running --output table
You’ll see the following:

- Connect to your instances with SSH using either the public or private IP address and the username ec2-user which is the default user for Amazon Linux. Type yes when asked if you want to connect to the instance.
Make sure to select the IP address of the instance you want to connect to and not the example IP address shown.
# don't forget to use your OWN ip address
# keep the username to ec2-user as is, don't use your name!
ssh -i ~/.ssh/lab-dcv-ami ec2-user@3.82.53.238
- Ping the internet to test the outbound connectivity.
ping www.wikipedia.org
You now have an functional instance that can access the internet.

Troubleshooting Instance Connections
There could be two primary reasons why you cannot connect to your instance:
- You are using the wrong EC2 key-pair. Verify that your private and public key-pair are matching, if not, create an instance with the proper key-pair or generate a new one and start a new instance with it.
- The security group does not allow SSH traffic to reach the instance. See the AWS support page on this subject.
Setup Password for DCV Remote Desktop Session
Set the password for ec2-user as below. Note, this is the password that you will use when prompted while connecting to the DCV Remote Desktop Session.
sudo passwd ec2-user

Launch a DCV session
Create a virtual session to connect to. Note, dcvdemo below is your session name, you can modify as you want. We will use this session name while connecting to Remote Desktop.
dcv create-session dcvdemo