a. Deploy EC2 instance with NICE DCV
In this section, you create an SSH key-pair on your AWS Cloud9 instance, create an Amazon EC2 instance with NICE DCV, then access it.
Generate an SSH Key-pair
SSH is commonly used to connect to Amazon EC2 instances. To allow you to connect to your instances, you can generate a key-pair using the AWS CLI in your AWS Cloud9 instance. This example uses the key name lab-dcv-ami but you can change the name of your key. Note that you can also re-use an existing key pair. Enter the following command to generate a key pair:
aws ec2 create-key-pair --key-name lab-dcv-ami --query KeyMaterial --output text > ~/.ssh/lab-dcv-ami
chmod 600 ~/.ssh/lab-dcv-ami
Optionally, use the following command to see previously registered keys:
aws ec2 describe-key-pairs
Create an Instance Profile for NICE DCV Licensing
The following steps use a CloudFormation template to create an instance profile, allowing the EC2 instance to access the NICE DCV licensing buckets:
curl https://www.hpcworkshops.com/scripts/dcv_license.zip -o dcv_license.zip
unzip dcv_license.zip
cd dcv_license
bash cfn_dcv_role.sh
cd ..
While waiting for the instance profile to be created, you can review the content in cfn_dcv_role.sh and cfn_dcv_policy.yaml to understand what the the behavior of the CloudFormation template. As described in Licensing the NICE DCV Server, the EC2 instance running the NICE DCV server must be able to reach the Amazon S3 endpoint and has permission to access the required S3 objects for NICE DCV licensing. The above-mentioned steps creates an instance profile, with the following access policy:
{
    "Version": "2012-10-17",
    "Statement": [
        {
            "Effect": "Allow",
            "Action": "s3:GetObject",
            "Resource": "arn:aws:s3:::dcv-license.<region>/*"
        }
    ]
}
Create an Amazon EC2 Instance with NICE DCV AMI
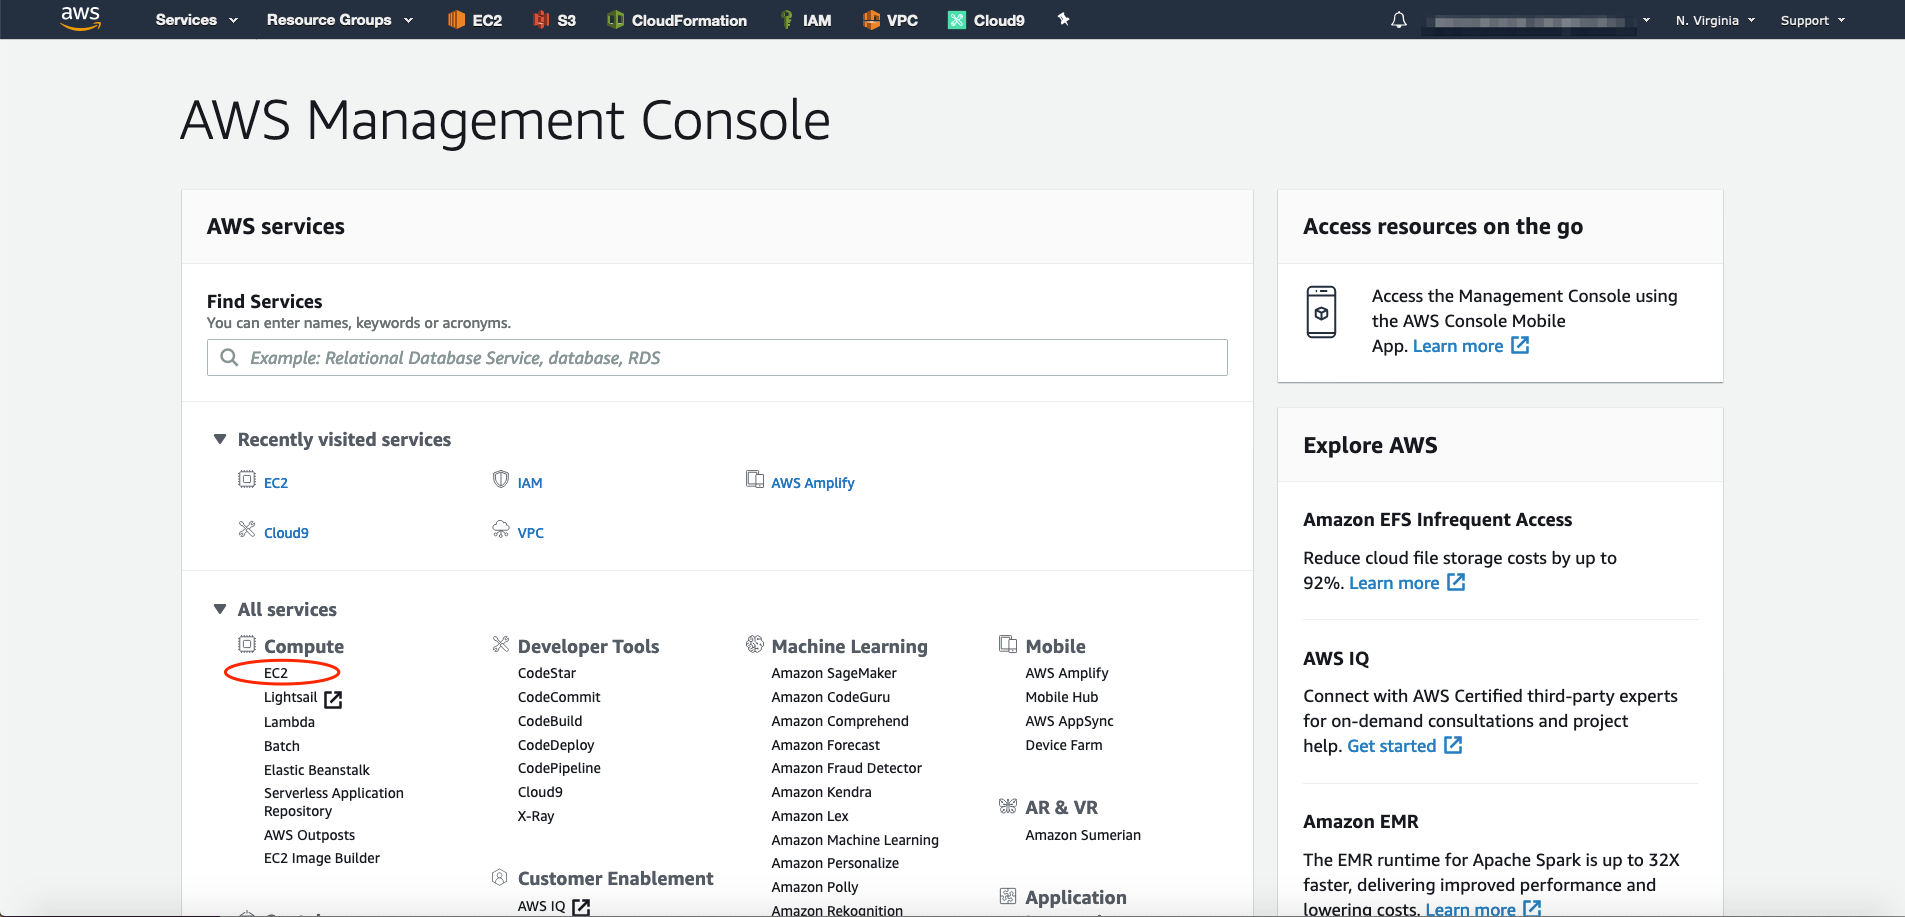
- In the AWS Management Console search bar type EC2 or click on the EC2 tab in Compute section. This will take you to the EC2 dashboard
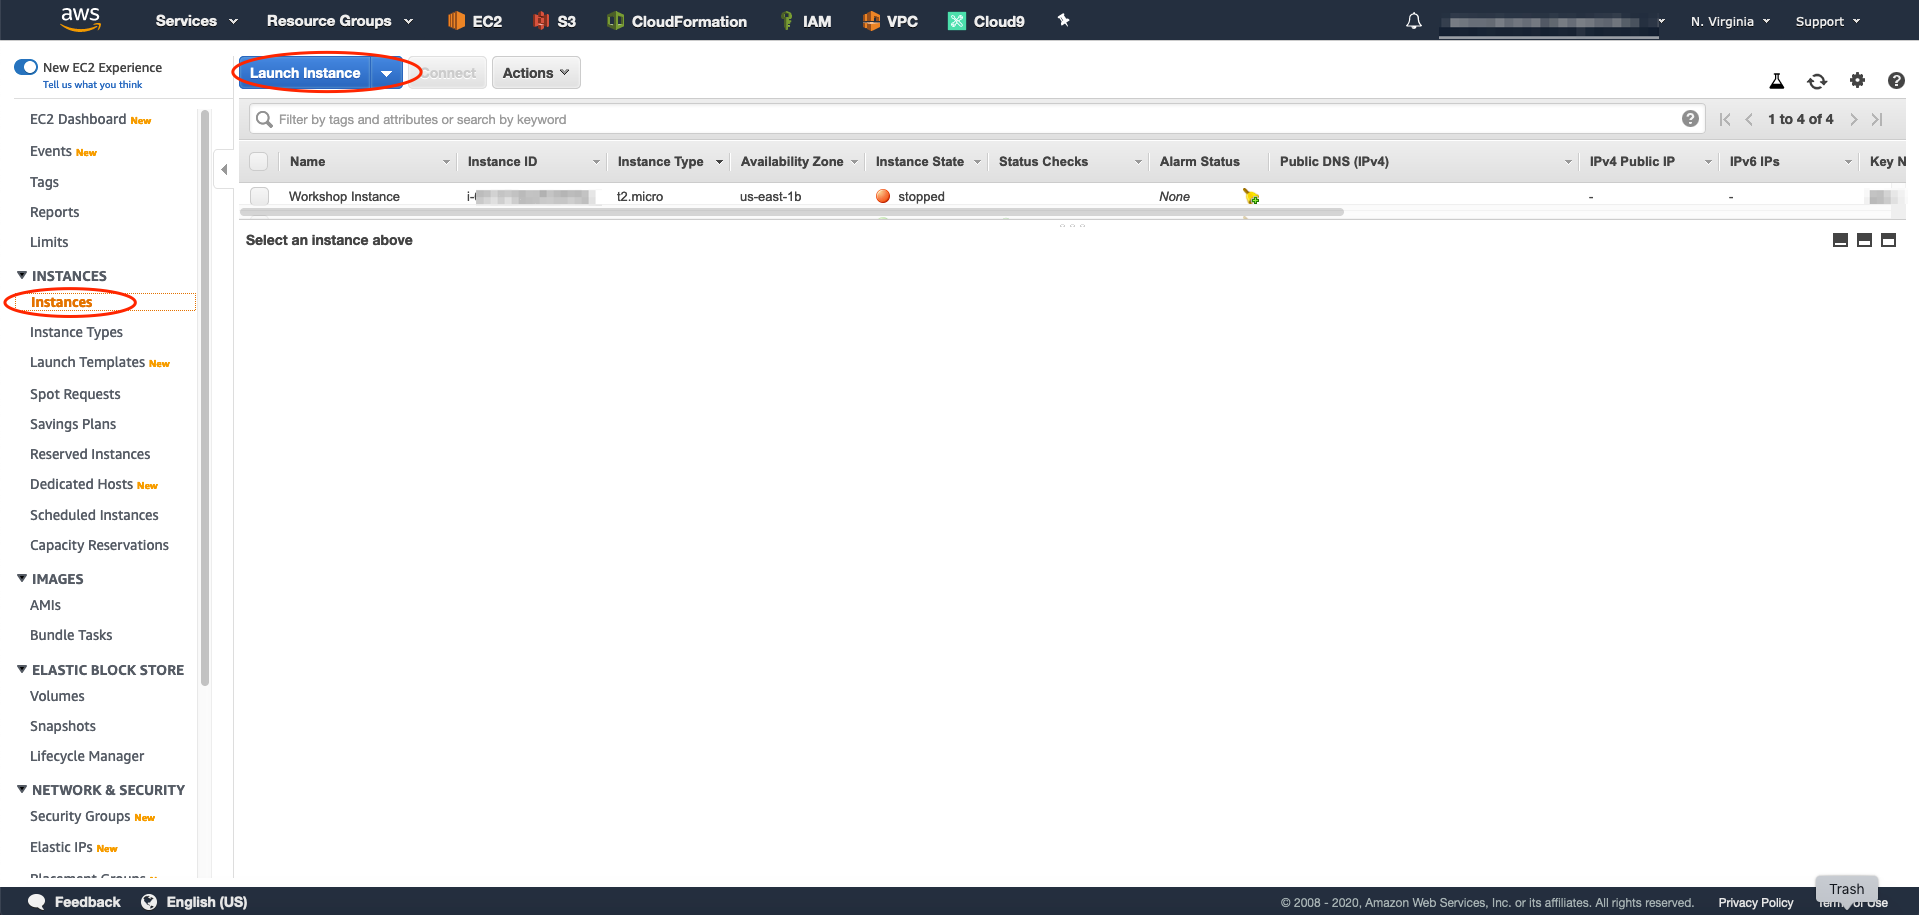
- Select Instances tab on left and click on Launch Instance
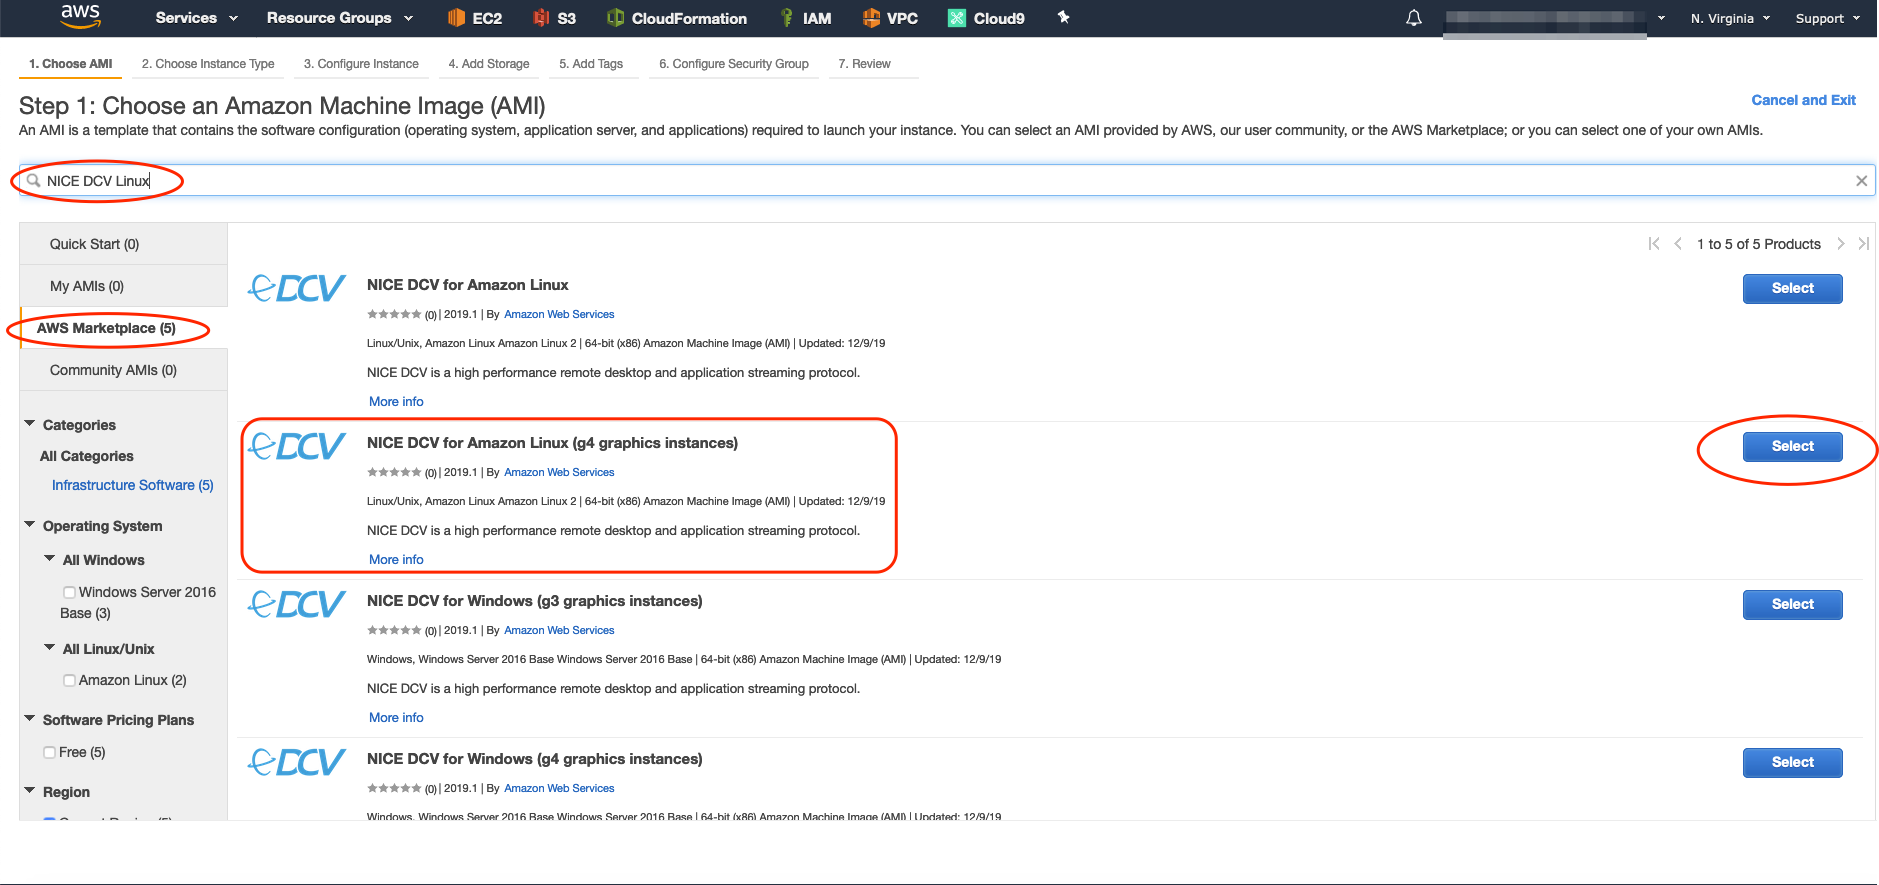
- Choose an Amazon Machine Image (AMI): Select AWS Marketplace and search for NICE DCV Linux. Select the NICE DCV for Amazon Linux (g4 graphics instance)
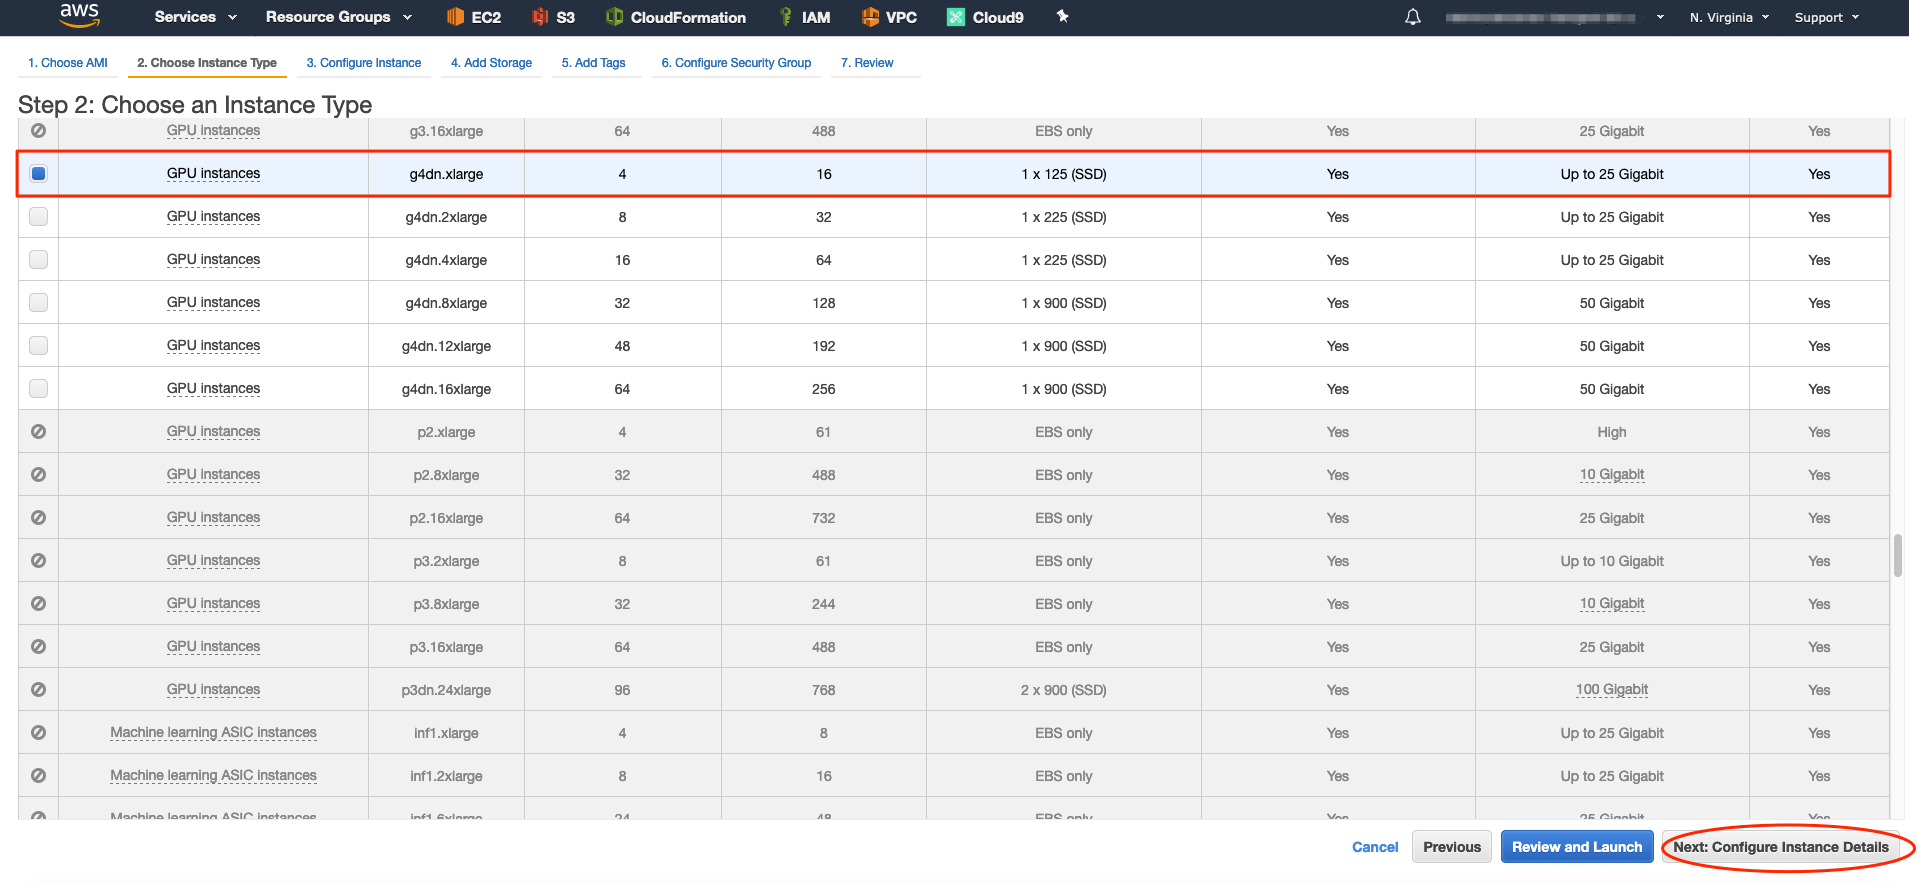
- Choose an Instance Type: The default instance type chosen with NICE DCV for Amazon Linux (g4 graphics instance) is g4dn.xlarge which provides latest generation NVIDIA Tesla T4 GPUs and AWS custom Intel Cascade Lake CPUs. g4 instances are cost-effective for high performance graphics intensive applications. Select the g4dn.xlarge instance and choose Next: Configure Instance Details
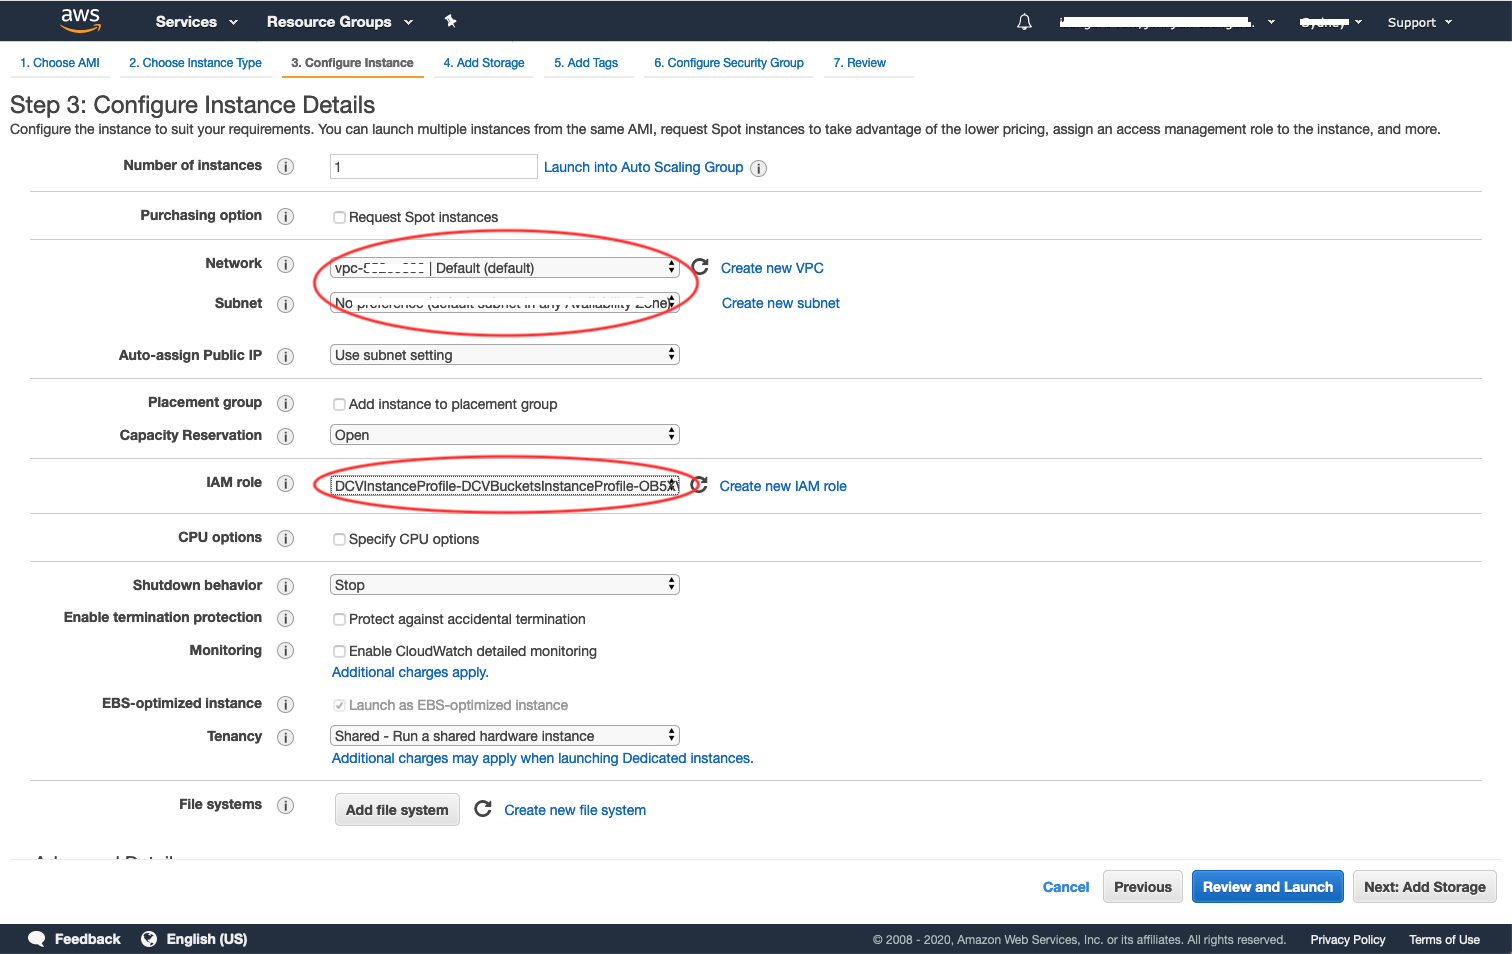
- Configure Instance: In the Network section, select the same VPC ID and same Subnet ID from your AWS Cloud9 Instance. In the IAM role section, select the instance profile we created a moment ago.
Use the following command to find the Subnet ID and VPC ID of the Cloud9 instance
MAC=$(curl -s http://169.254.169.254/latest/meta-data/network/interfaces/macs/)
cat << EOF
***********************************************************************************
Subnet ID = $(curl -s http://169.254.169.254/latest/meta-data/network/interfaces/macs/$MAC/subnet-id)
VPC ID = $(curl -s http://169.254.169.254/latest/meta-data/network/interfaces/macs/$MAC/vpc-id)
************************************************************************************
EOF
Use the following command to find out the name of the instance profile:
aws cloudformation describe-stacks --stack-name DCVInstanceProfile --output text --query 'Stacks[0].Outputs[?OutputKey == `InstanceProfileARN`].OutputValue'
-
Add Storage: Choose Next: Add Storage and leave the Storage section with default settings.
-
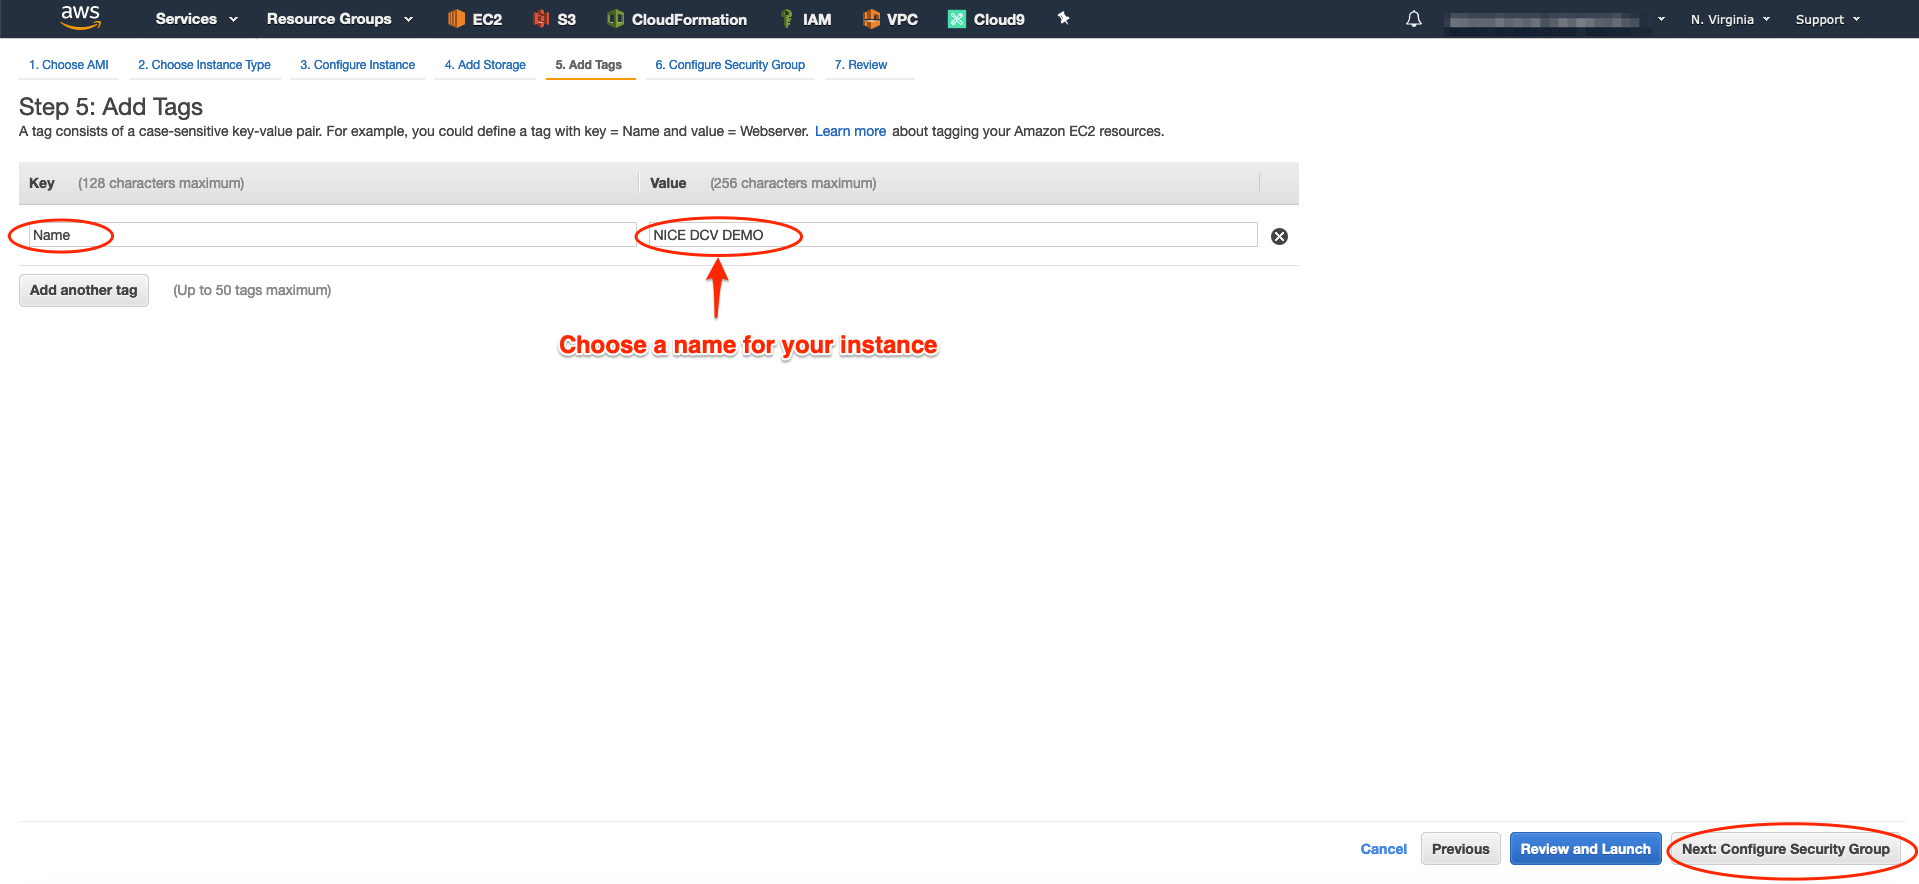
Add Tags: Choose Next: Add Tags. Here you will tag your EC2 instance. Click on Add Tag, in the Key enter Name and in the Value enter [Your Instance Name]. This name is shown on EC2 Dashboard. Now, choose Next: Configure Security Group.
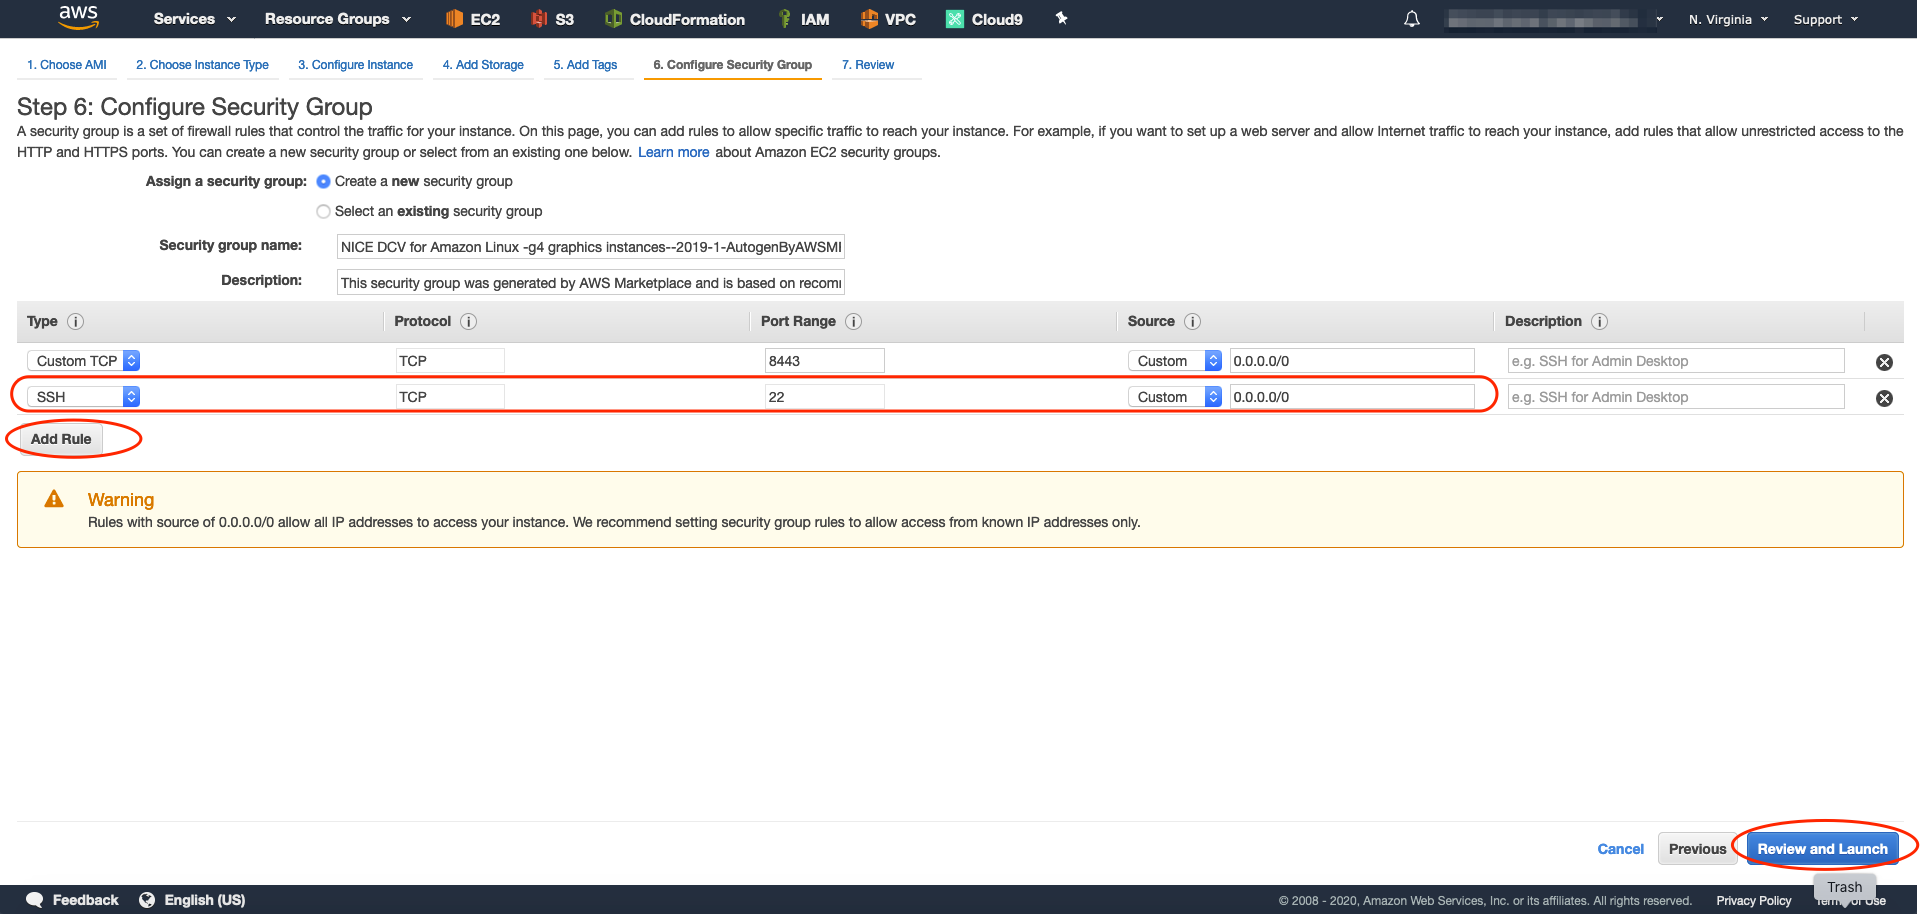
- Configure Security Group: Here you can control firewall rules that control traffic for your instance. Note that by default , the NICE DCV server communicates over port 8443. Since we use the NICE DCV AMI this port is already enabled by default. We need to enable SSH access by adding Port 22 to the Security Group. Click on Add Rule, choose ssh type, protocol TCP, port range 22 and source 0.0.0.0/0.
-
Choose Review and Launch. Ignore any warning messages.
-
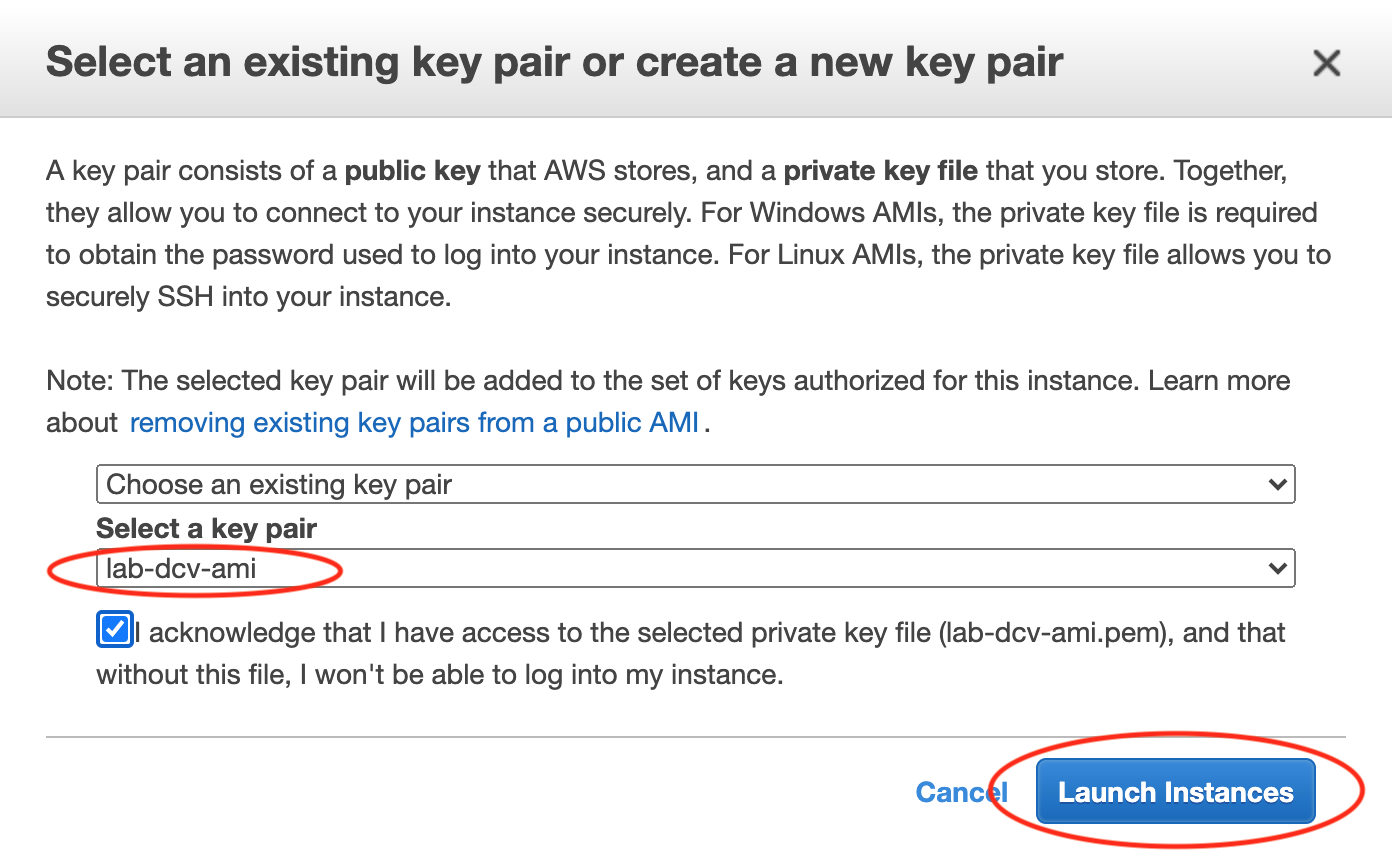
On the review page, choose Launch, then select the lab-dcv-ami SSH key-pair you created earlier. Click on Launch Instances
- Your instance is getting launched. Go to EC2 Dashboard and click on Instances to check status
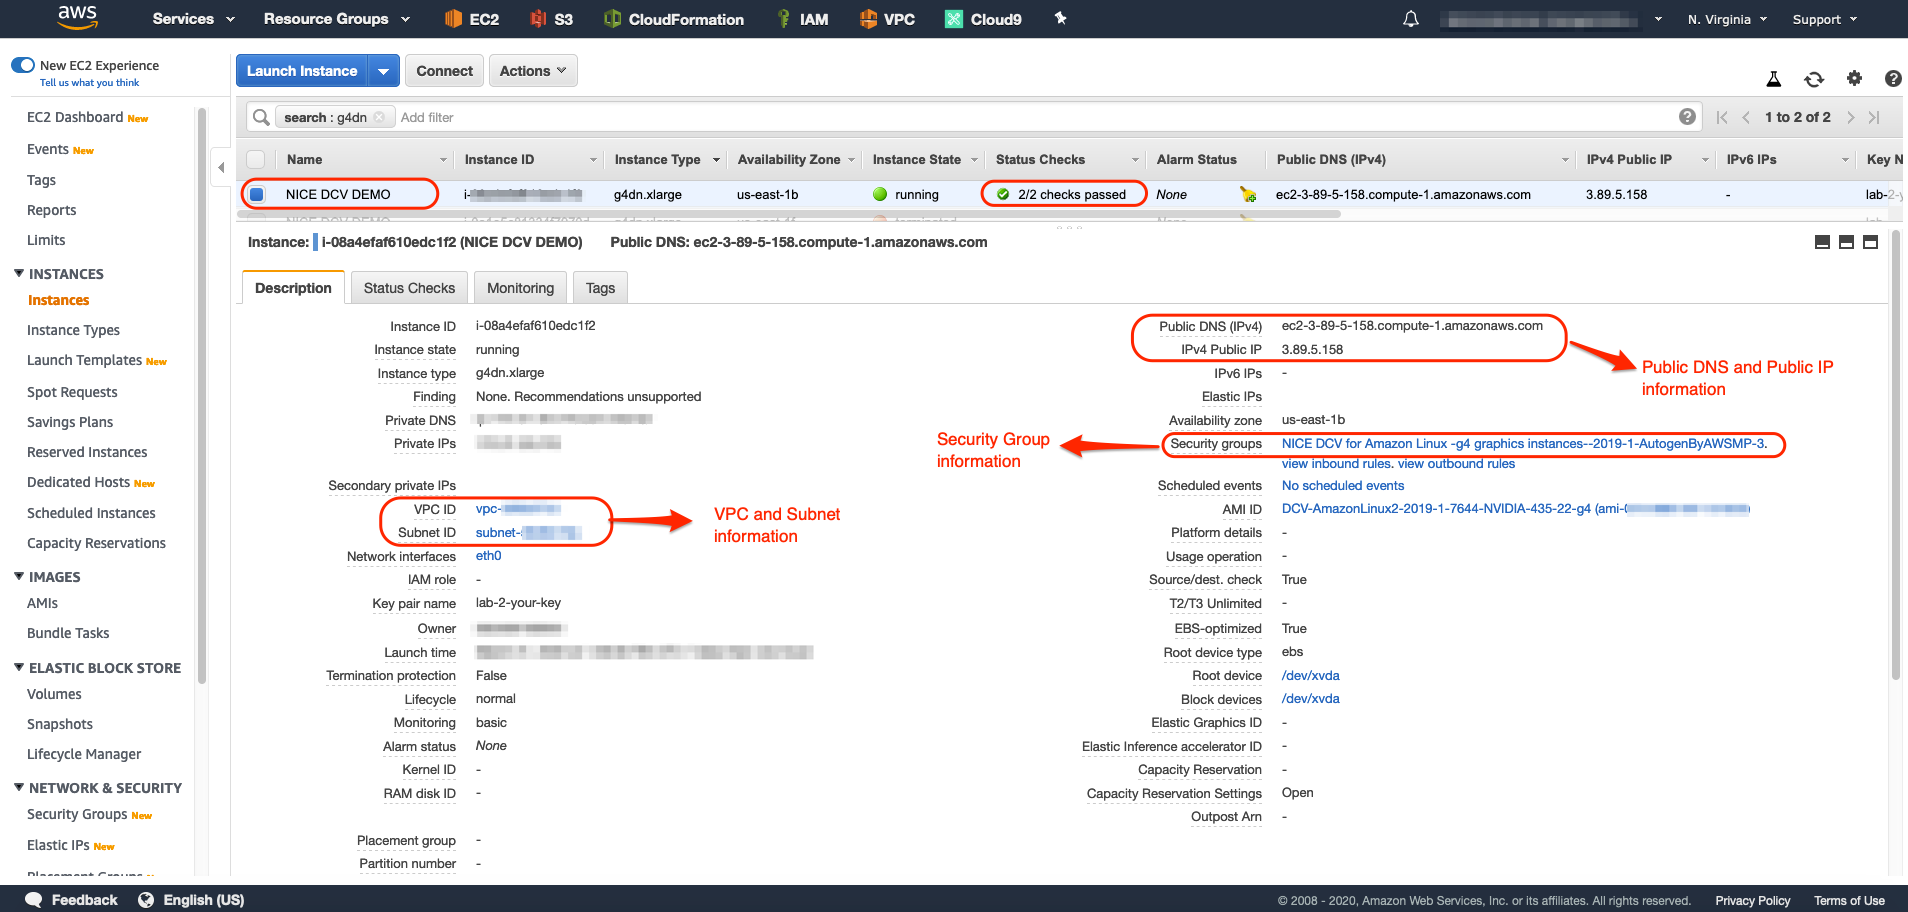
Next, we will connect to the instance