f. Opt - Create an EC2 Instance
These steps are optional and if you have extra time. Please consider moving to Lab I.
In this section, you create an SSH key-pair on your AWS Cloud9 instance, create an Amazon EC2 instance, then access it.
Generate an SSH Key-pair
SSH is commonly used to connect to Amazon EC2 instances. To allow you to connect to your instances, you can generate a key-pair using the AWS CLI in your AWS Cloud9 instance. This example uses the key name lab-2-your-key but you can change the name of your key. Enter the following command to generate a key pair:
aws ec2 create-key-pair --key-name lab-2-your-key --query KeyMaterial --output text > ~/.ssh/id_rsa
chmod 600 ~/.ssh/id_rsa
Optionally, use the following command to check if your key is registered:
aws ec2 describe-key-pairs
Create a New Amazon EC2 Instance
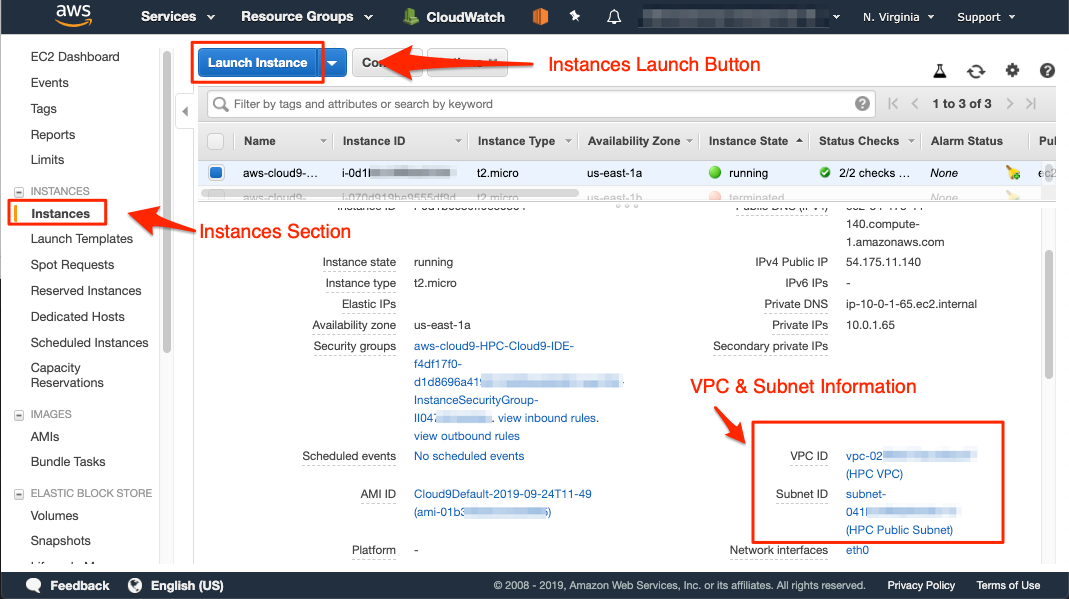
When you create an EC2 instance, you need to place it in an Amazon Virtual Private Cloud (VPC). As a first step, identify the VPC and subnet of the AWS Cloud9 instance so you can place the EC2 instance in the same location.
- Use the following command to find the Subnet ID and VPC ID of the Cloud9 instance. You use this information in the next step to launch an instance.
MAC=$(curl -s http://169.254.169.254/latest/meta-data/network/interfaces/macs/)
cat << EOF
***********************************************************************************
Subnet ID = $(curl -s http://169.254.169.254/latest/meta-data/network/interfaces/macs/$MAC/subnet-id)
VPC ID = $(curl -s http://169.254.169.254/latest/meta-data/network/interfaces/macs/$MAC/vpc-id)
************************************************************************************
EOF
- In the AWS Management Console, navigate to the EC2 Dashboard, then to the Instances section.
- Choose Launch Instance.
- Choose the Amazon Linux 2 AMI and click Select.
- Select the t2.micro instance then choose Next: Configure Instance Details.
- In the Network section, select the same VPC ID and same Subnet ID from your AWS Cloud9 Instance.
- Choose Next: Add Storage and leave the Storage section default settings.
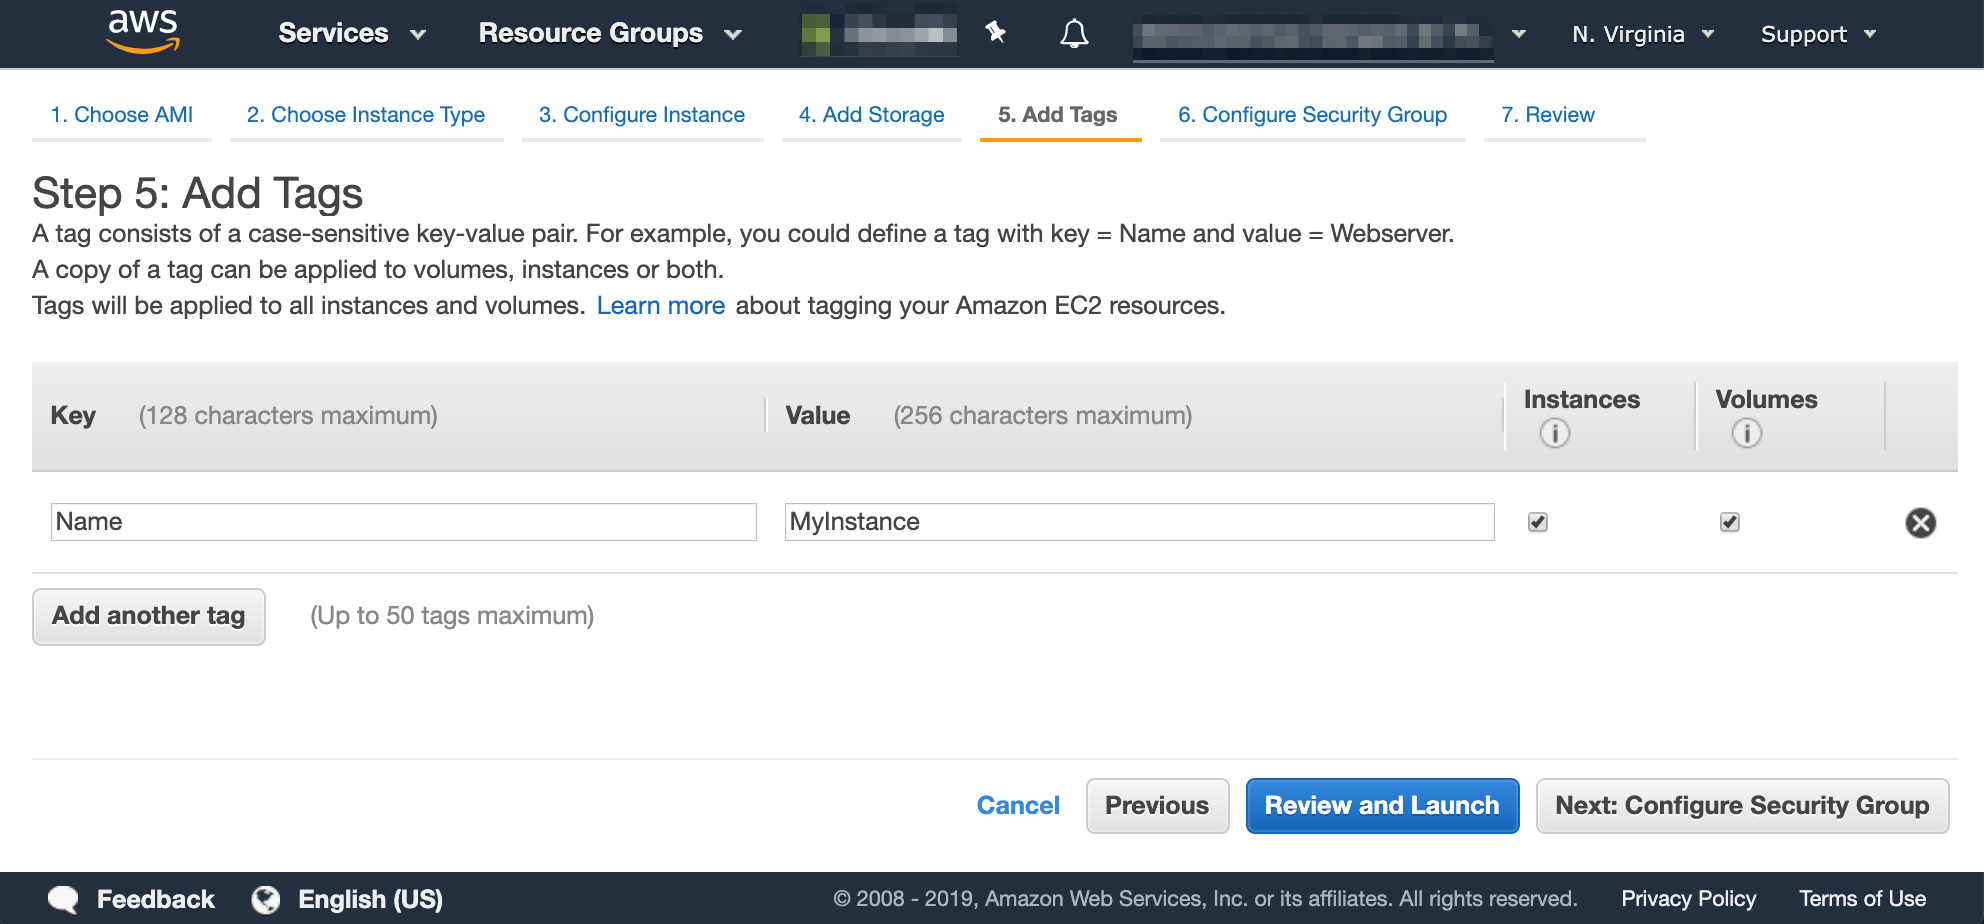
- Choose Next: Add Tags.
- Choose Add Tag then as a Key input Name (literally, not your name!). For Value, add [Your Name]’s Instance or any significant name. This name appears as the name of your instance.
- Choose Next: Configure Security Groups.
- Select the Create a new security group check box, and if desired, change the Security Group name. The type should be ssh, protocol TCP, port range 22 and the source 0.0.0.0/0.
- Choose Review and Launch. Ignore any warnings messages.
- On the review page, choose Launch, then select the lab-2-your-key key-pair you created earlier.

Your instance is being launched! To check the status, view the Instances section of the EC2 Dashboard.
Connect to Your Instance
If you are having issues connecting to your instance, navigate to the EC2 Dashboard in the AWS Management Console. Select your instance and review its details. See also the troubleshooting section at the bottom of this page.
After the instance is running, follow these steps:
- Navigate to the AWS Cloud9 environment and open a terminal window.
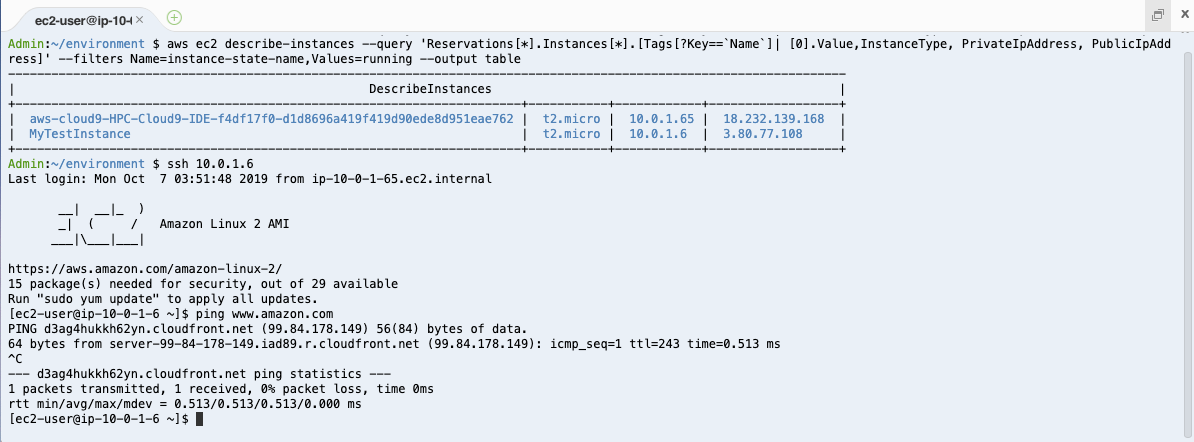
- Use the following command to list running instances and display their names, type, private IP address, and public IP address. Here, the information is filtered to only keep certain details (hence the complex command). The same information is displayed on the EC2 Dashboard.
aws ec2 describe-instances --query 'Reservations[*].Instances[*].[Tags[?Key==`Name`]| [0].Value,InstanceType, PrivateIpAddress, PublicIpAddress]' --filters Name=instance-state-name,Values=running --output table
- Connect to your instances with SSH using either the public or private IP address and the username ec2-user which is the default user for Amazon Linux. Type yes when asked if you want to connect to the instance.
Make sure to select the IP address of the instance you want to connect to and not the example IP address shown.
# don't forget to use your OWN ip address
# keep the username to ec2-user as is, don't use your name!
ssh ec2-user@10.0.1.6
- Ping the internet to test the outbound connectivity.
ping www.wikipedia.org
You now have an functional instance that can communicate with the outside world! Continue to the next section to see what else you can do.
Don’t forget to log out of your instance using ctrl-D or exit.
Troubleshooting Instance Connections
There could be two primary reasons why you cannot connect to your instance:
- You are using the wrong EC2 key-pair. Verify that your private and public key-pair are matching, if not, create an instance with the proper key-pair or generate a new one and start a new instance with it.
- The security group does not allow SSH traffic to reach the instance. See the AWS support page on this subject.